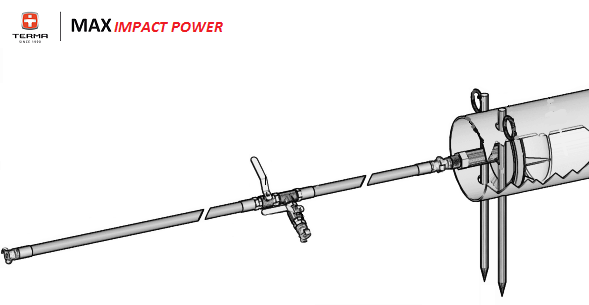
Solo-boring
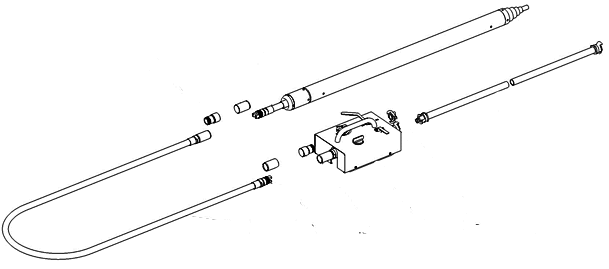
For this action the machine should have the End Screw. To perform a Solo-Boring connect the Air hose between air-compressor and Control Station and between Pneumatic mole and Control Station.
Then:
- Position MAX into the starting pit and align precisely to the planned target
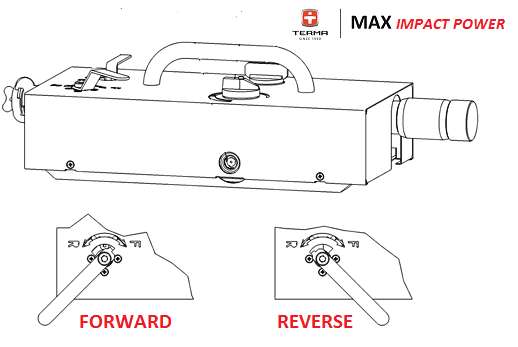
- Direction handle in Forward position.
- Valve of the air supply at the Control Station with a quick movement open to the maximum position, to start-up the MAX at full power.
- When the MAX starts to operate, the air supply has to be reduced. This is necessary because the MAX has not been run into the soil. When the air supply valve is fully open at the lubricator (2), the MAX will be unstable and will not be able to move forward and backwards. Slowly opening the valve ensures that the MAX will slowly navigate its way into the soil while remaining stable i.e. not moving from forward to backward.
- Whilst the MAX slowly finds its way into the soil, the MAX will stop a few times while finding its target. The direction should be checked for accuracy, to avoid the MAX going out of line.
- After the MAX has drilled into the soil for 1/2 up to 2/3 of its length (this depends on ground conditions), you can open the supply valve and the MAX can be used at full speed.
- The disappearance of the MAX into the pit wall contents can result in soil being thrown outside abruptly, which may lead to eye damage.
- During drilling, monitor the air hose at all times and the noises emitted from the MAX. If the hose is shaking rapidly, (cycling back and forth in the starting pit) the MAX could be swimming in the bore. Reduce the air supply to the MAX to allow the soil to grip the sides of the casing and allow forward progress to continue.
- At all times, a good flow of Control Station is required.
- When Max enters the End pit, reduce the air flow
Reversing pneumatic mole
Max can easily reverse (move backward) to the starting pit if there is not enough space to lift the MAX out of the End pit.
To reverse Max:
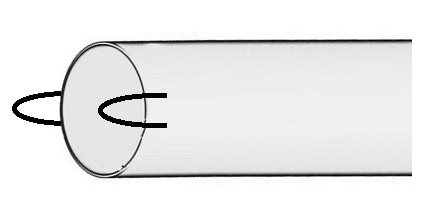
- Position the handle of the control valve in Reverse (R) on the lubricator. Reversing MAX from Forward to backward is done under pressure (do not close the air supply).
- When reversing, the operator should firmly hold the hose and ensure that the tool does not back-up over it.
Installing plastic pipes manually
For installing PE, PVC pipes manually the Insert nipple need to be used. This method can be used for pipes with a diameter Æ25÷Æ55 mm.
To insert the tubes by hand proceed to the following steps:
- After creating the hole with MAX, the piercing tool needs to be disconnected from the Air Hose than disconnect the Air Hose from the Lubricator (The air hose stay in the drilled bore hole)
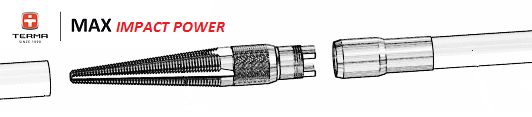
- Insert nipple to be screwed in the plastic tube screw it well tight.
- Insert nipple will need to be connect to the Air hose
- From the starting Pit carefully pull the air hose your way and the pipe will come after the air hose through the bore hole.
Direct installing Plastic Pipes SMALLER DIAMETER
This method is used for the installation of plastic pipes in one.
The Max should be equipped with the Tool for inserting PE/PVC. Additionally is needed chain tool for screwing PE/PVC tubes into the machine.
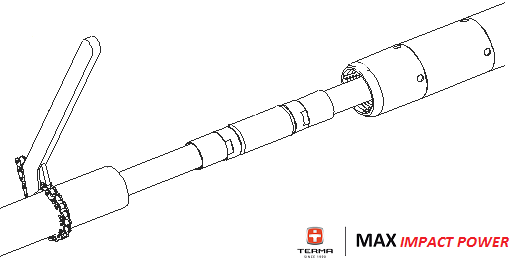
For the immediate retraction of PE, PVC pipes smaller diameter (up to 90 mm) please proceed as follows:
- Connect the Air hose
- Position MAX into the starting pit and align precisely to the planned target
- Direction handle in Forward position (F).
- Valve of the air supply at the Control Station with a quick movement open to the maximum position, to start-up the MAX at full power.
- When the MAX starts to operate, the air supply has to be reduced. This is necessary because the MAX has not been into the soil. When the air supply valve is fully open at the lubricator, the MAX will be unstable and will be able to move forward and backwards. Slowly opening the valve ensures that the MAX will slowly navigate its way into the soil while remaining stable i.e. not moving from forward to backward.
- Whilst the MAX slowly finds its way into the soil, the MAX will stop a few times while finding its target. The direction should be checked for accuracy, to avoid the MAX going out of line
- MAX Impact Power needs to stop when it is for ¾ of the length into the soil
- Disconnect the air hose from the small connection hose at the MAX
- Air hose to be placed in the pipe insert
- Connect the air hose with the small connection hose at the MAX
- Screwing pipe into the screw nipple using the chain tool
- Start the MAX machine. During operation the consumed air will be discharged through the end part of the pipe. The soil or debris acquired during the process of connecting the pipe to the MAX can suddenly be thrown out of the pipe.
- After the MAX has arrived in the End pit, the air supply needs to be reduced.
- In the End pit, enough space should be available in order to disconnect the pipes and the Air hose.
- Slowly close the air supply and allow the MAX to stop.
- Disconnect all parts, clamps and clamping plate.
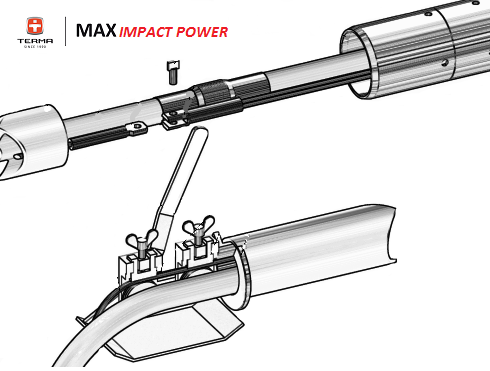
Direct installing Plastic Pipes BIGGER DIAMETER
This method is used for the installation of plastic pipes in one. The MAX should be equipped with the Sleeve with rope connections, pulling rope and the clamping plate with tensioner.
For the immediate retraction of PE, PVC pipes please proceed as follows:
- Connect the Air hose.
- Position MAX into the starting pit and align precisely to the planned target.
- Direction handle in Forward position (F) .
- Valve of the air supply at the lubricator with a quick movement open to the maximum position, to start-up the MAX at full power.
- When the MAX starts to operate, the air supply has to be reduced. This is necessary because the MAX has not been run into the soil. When the air supply valve is fully open at the Control Station, the MAX will be unstable and will not be able to move forward and backwards. Slowly opening the valve ensures that the MAX will slowly navigate its way into the soil while remaining stable i.e. not moving from forward to backward.
- Whilst the MAX slowly finds its way into the soil, the MAX will stop a few times while finding its target. The direction should be checked for accuracy, to avoid the MAX going out of line.
- MAX needs to stop when it is for ¾ of the length into the soil
- Disconnect the air hose from the small connection hose at the MAX
- Air hose and pulling rope to be placed in the pipe insert
- Then forward the tied hose after pulling the rope, separate from each other again.
- Extensions of the connection cable and the pulling rope have to be link up with the screw.
- The installed pipe in the sleeve can now be squeezed in.
- Into one of the pipe ends the inserted part can be lead with the insertion piece.
- After the pulling rope put the clamps on the tensioner.
- The jaws of the tensioner with the screws need to be pressed down.
- With the handle pull the rope and by prestressing in succession to connect the recovered insertion sleeve-tube on the threaded sleeve (on the machine)
- After reaching a sufficient pressure on the coupled parts we can Start the mole. During operation the consumed air will be discharged through the end part of the pipe. The soil or debris acquired during the process of connecting the pipe to the MAX can suddenly be thrown out of the pipe.
- After the MAX has arrived in the End pit, the air supply needs to be reduced.
- In the End pit, enough space should be available in order to disconnect the pipes and the Air hose.
- Slowly close the air supply and allow the MAX to stop.
- Disconnect all parts, pulling rope, clamps and tensioner.
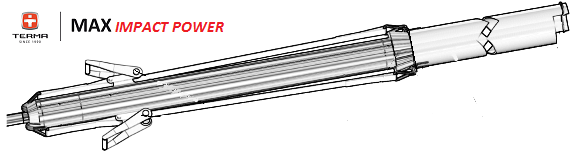
Ramming steel pipes
For steel pipe jacking the Max could be equipped with the Sleeve with rope connections or with the End screw. Depending on the diameter of the pipe the correct cone and straps need to be used.
Steel Pipe Ramming as indicated by the following steps:
- At the beginning of the steel pipe the two rings need to be welded;
First the 2 rings are welded on the outside, then another in the inside of the tube to facilitate the removal of debris after completion.

At the end of the tube the connections are welded two ears to attach the straps (to connect the machine to the steel pipe):
- The steel pipe in the starting pit, placed in the direction of the planned installation.
- Cone to be placed in the steel pipe.
- Prepare the ground that machine and pipe are on same level of height.
- Max with the head forwards to be positioned in the cone with help of the straps establish connection with the pipe. The straps on one side hold the welded ears on the tube and the sleeve on the other side in contact with the MAX.
- Compressed air hose to be connected
- Handle on the Lubricator to be positioned in to F (forward)
- Start the machine
- If the pre-exaggerated tube has reached its target, stop the machine.
- Remove the straps.
- Change the course of direction of the MAX (R) to reverse.
- Start the Max and to enable to release the machine from the cone
- Finally remove/release the cone from the steel pipe.
Clearing of steel pipes
For clearing the pipes, proceed as follows: Locking plate (size used, depend on the diameter of the pipe), Plunger, Locking pins to secure the locking plate, Air hose with valves and welding machine.
To remove soil after pipe driving, proceed as follows:
- Remove by hand or shovel some soil, depth of removal is 3 to 4 times the diameter of the pipe.
- make a four holes in the pipe for the locking pins in accordance with the drawing the holes need to be burned out.
- To avoid damage to the sealing plate, should be removed a cinder and should be waiting for cooling down.
- Put Plunger in the prepared pipe.
- Shutter plate to be placed inside the pipe and secure with the locking pins
- Tighten up the seal plate using tool 60 mm
- Connect the Air hose with valves on the shorter end of the sealing plate.
- The other end of the Air hose tube connected to the Air compressor.
- Ensure that the valves are closed, ensure all connections are well secured and tightened.
- Start the compressor.
- Open the valve on the compressor (keep the valves on the hose closed) and wait till the hose is filled with compressed air.
- To start clearing the pipe open the valves on the air hose.
- If the device does not start after 2 minutes the compressor needs to be switched off.
- Release air slowly by opening carefully the valves.
- Close the valves.
- To seal and lubricate the plunger some water can be inserted though the valve in the hose.
- Close the valve
- When the removal of the soil core begins, reducing the air supply can be used to limit the speed and the power the debris will be thrown out
More information - see in MANUALL of MAX Impact Power
More information - please ask our Sales Department
|
English
 |
+48 607 451 268 |
|
Русский язык
 |
+48 607 451 268 |
More information - please ask our Local Partner
|
 Search


 back
back